
My son is now reaching the age where he is beginning to eat fruits and vegetables from a jar. So of course, I've got baby food jars all around the house. I've informed my husband that we MUST keep all of the jars because they make such great crafting starters. He interprets it as: "More Stuff in our already small home". But my rebuttal is, "You never know when the creative part of my brain needs to be satisfied, thus the reason we need to have them all around."(good argument right?)
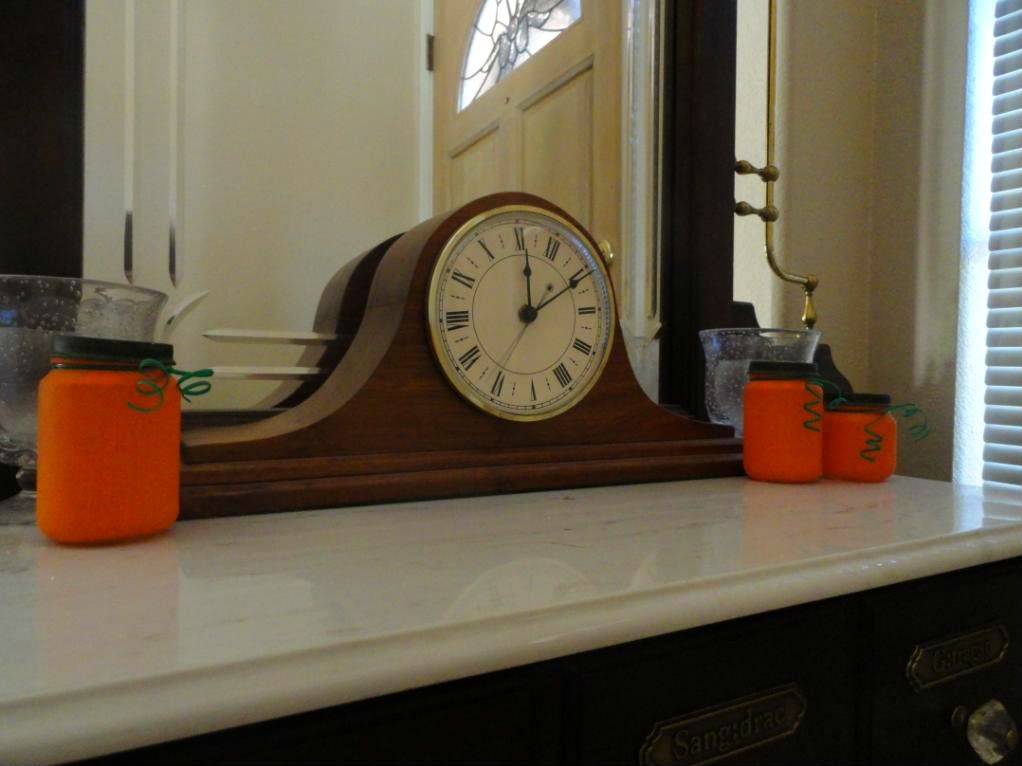
Here we go. I'm sure people have created these many times in the past, but I am just in love with them and they were so easy to make. I now have my three little baby jar pumpkins in the front entry way for me to see each day as we enter. I think even if you don't have a kid around to eat the baby food, it's still a really cheap craft to make; baby food is about 60 cents per jar.
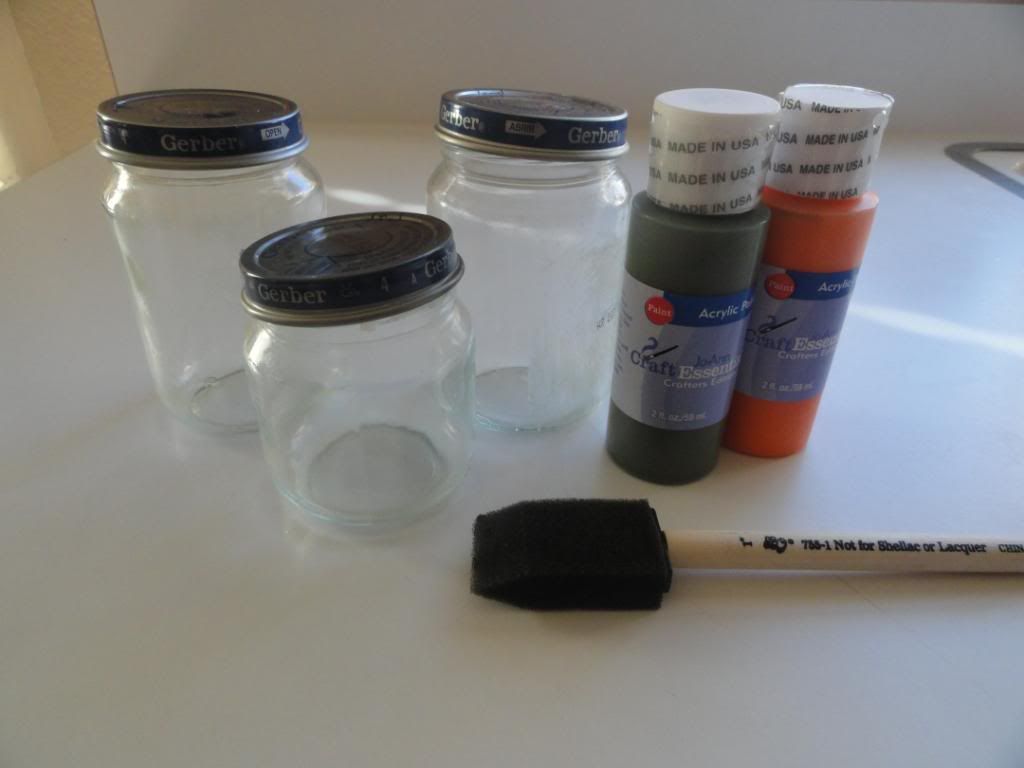
Supplies: Three baby food jars, cleaned from paper and glue. One sponge brush. Orange and Green Paint. (You will also need a black sharpie marker).
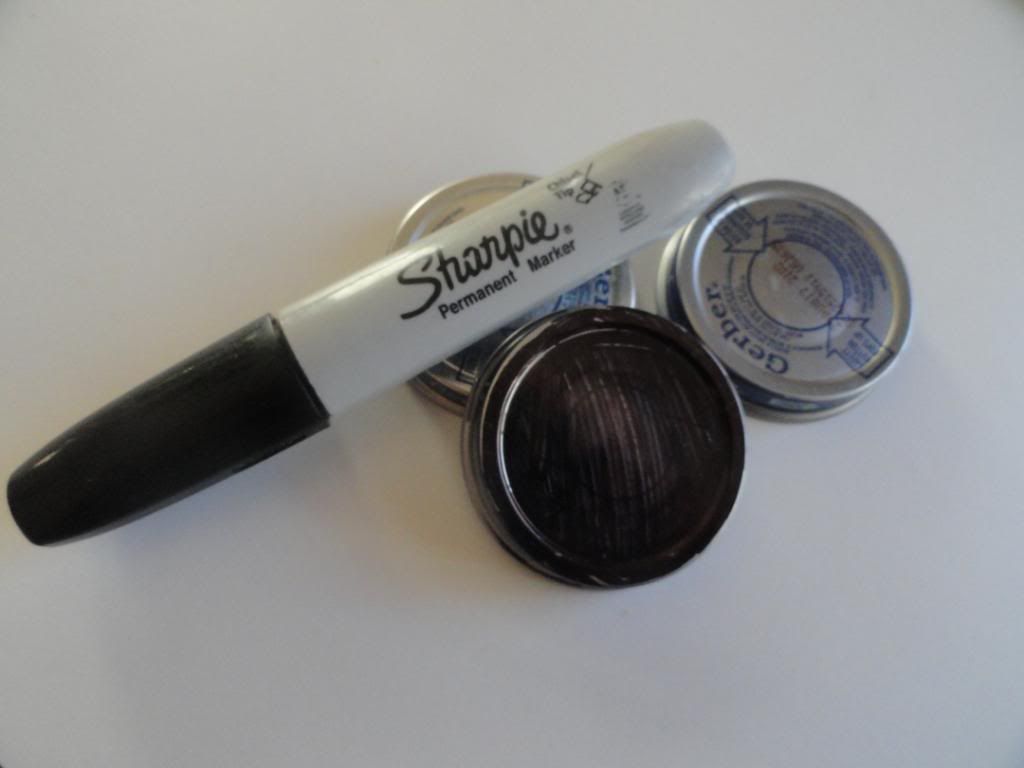
Color in the tops of the lids with a black Sharpie so you don't have to battle with seeing the words showing through the paint.
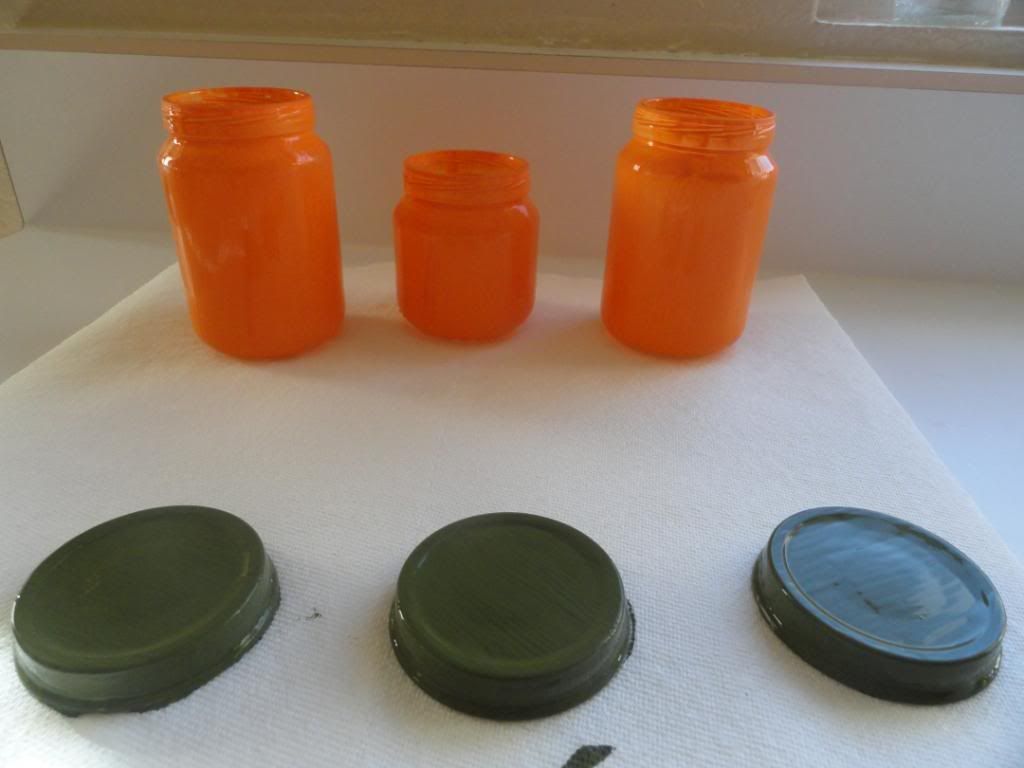
Paint the jars orange and lids green using the sponge brush.
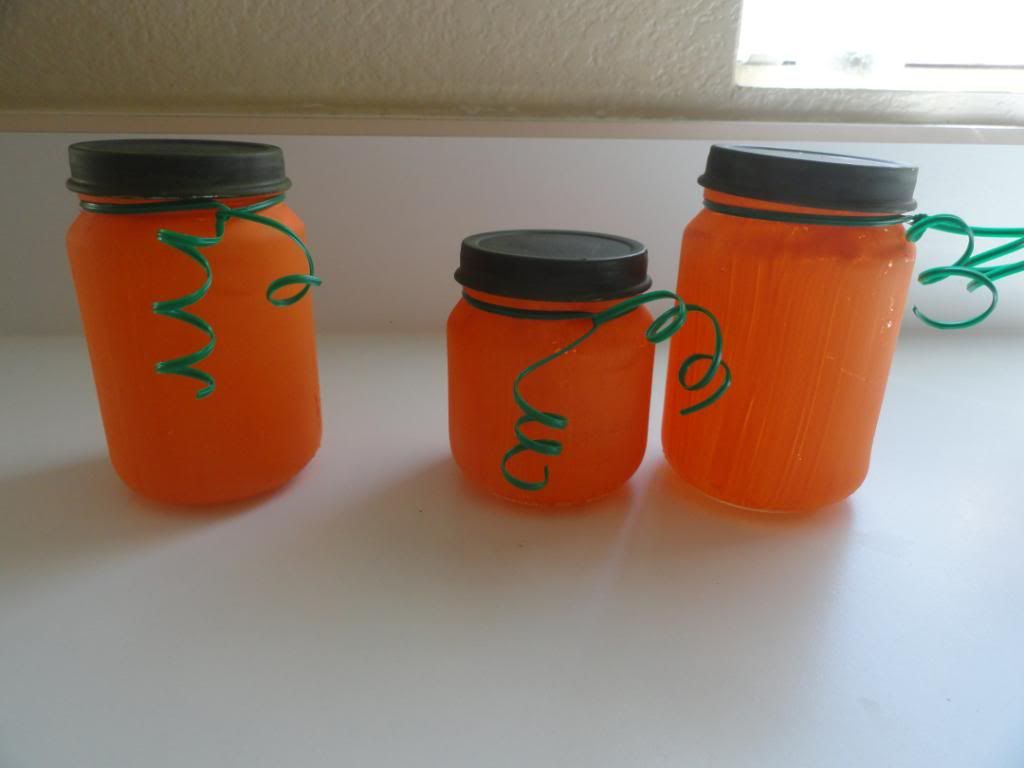
Cap jars off with their lids. If you have any green wire around it is the perfect addition to your pumpkins. I used a writing pen and wrapped the wire around giving it an adorable little curly q.
Seriously, aren't these adorable? And so simple to make!
What have you made using baby food jars?
No comments:
Post a Comment